
Always, work always start with the non-pretty but essential and concealed parts of the home which requires a lot of coordination and understanding of where and how each carpentry elements will work in the house.
Especially areas like Kid's Room and Study area where it is a little more compact, but practical with proper allocation of storage and electrical points.


Electrical works to start off everything. Especially for situation where there is socket points on Kitchen Island, then the wiring will need to go through the floor. Once that is done, the ceiling will start to be covered.
In order to gain control of the budget, TV console and Study area is built using Gypsum/ partition boards, which in turns allows the edges to be formed in curved shape.
The site is then cleared to allow for Vinyl flooring installation.


Existing Wet Kitchen is also cleared to make way for a dryer Wet Kitchen, which is separated from the new Laundry area at the Yard.
New windows and sliding doors ensued.


Once electrical work is completed. a big portion of the ceiling of the Master Bedroom needed to be lowered down to accommodate a ceiling cassette air-conditioning unit, as with the case with the rest of the house. We needed to be strategic with this to prevent all areas of the ceiling to be lowered down.
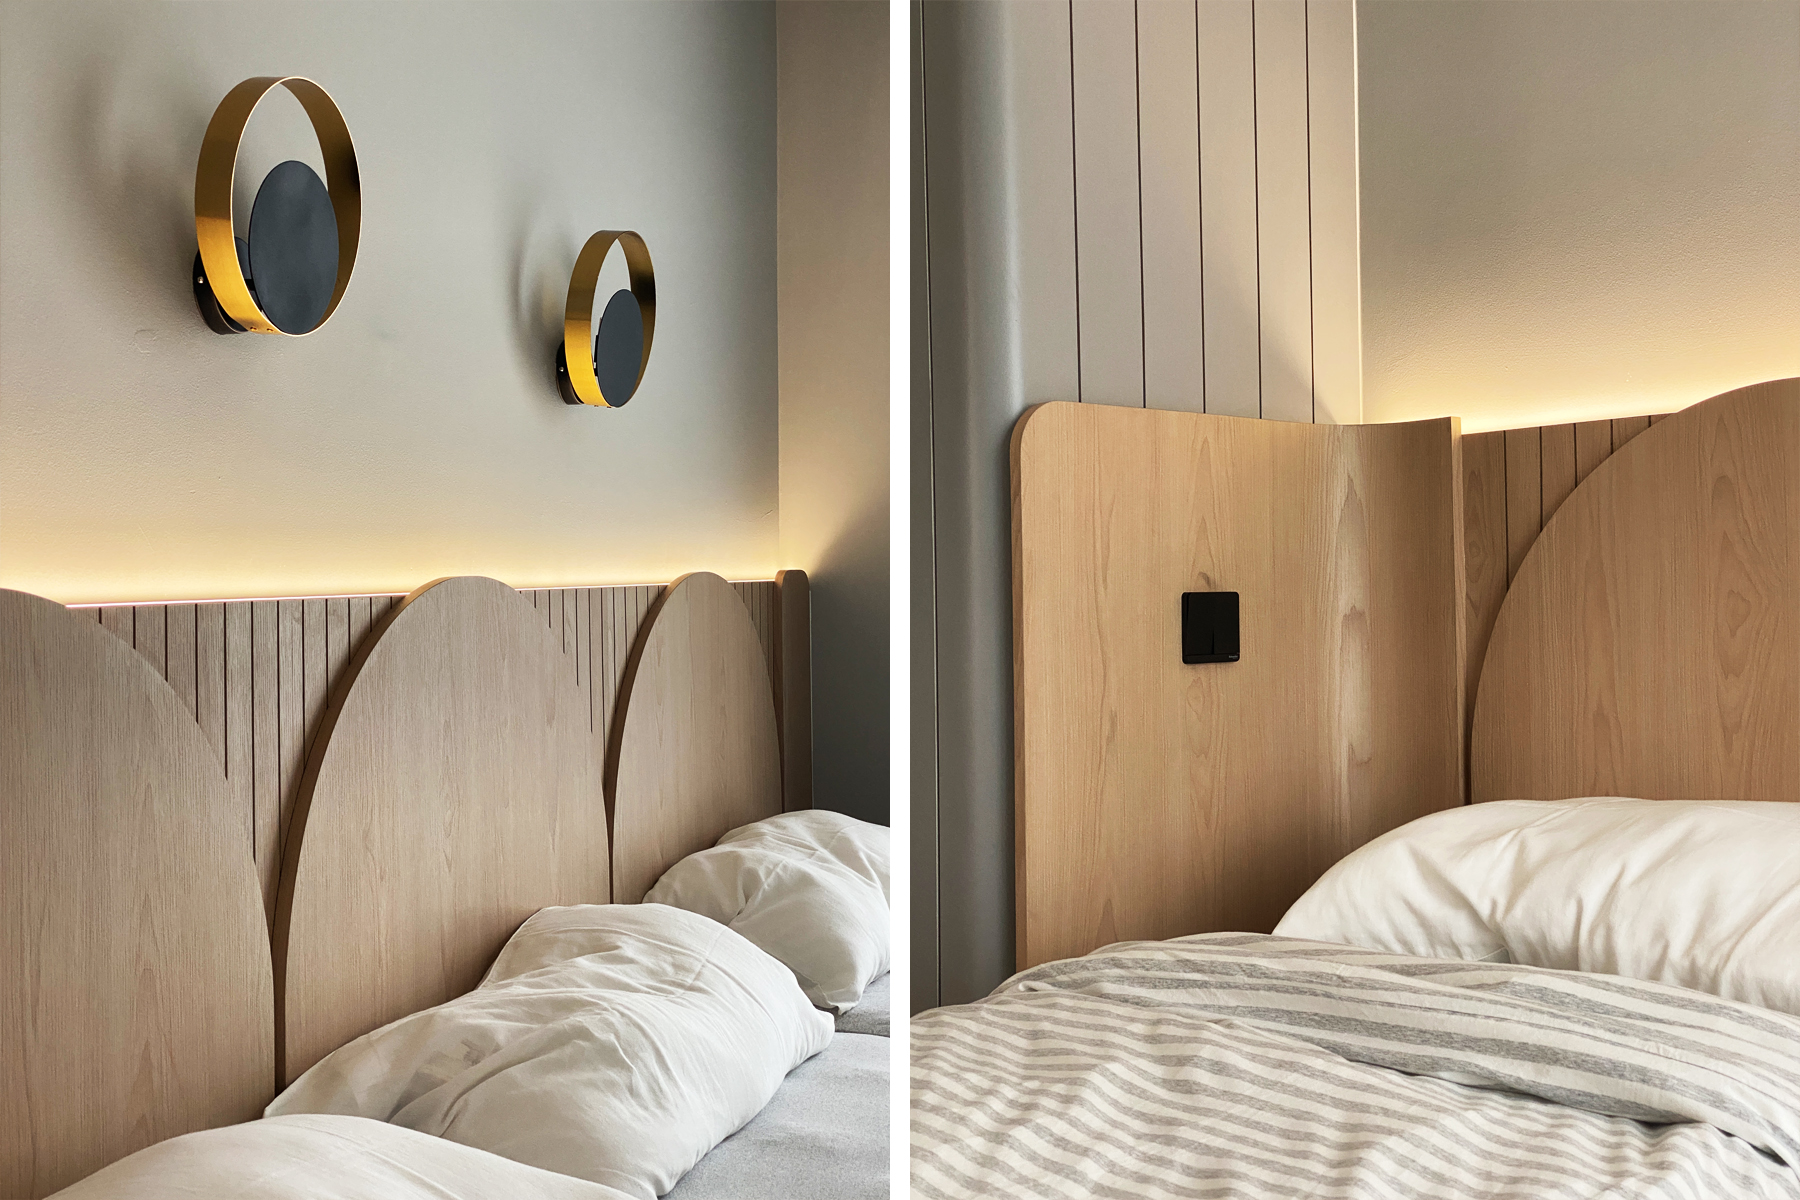
A partition board headboard (similar to Living Room) is also built up to cover part of the L-shaped window, which was intruding into the bed space. This solution provides a wider headboard and allows bed to be centre to the room rather than being pushed to the side by the window. Also curtains are then allowed to be pulled all the way and be hidden by the new headboard.


As with the Master Bedroom. we also had to be strategic with the planning of the ceiling design. What's more tricky is that this Kid's Room will have a platform style sleeping arrangement, that will further lower the floor to ceiling height, thus incapable of having any ceiling fans.


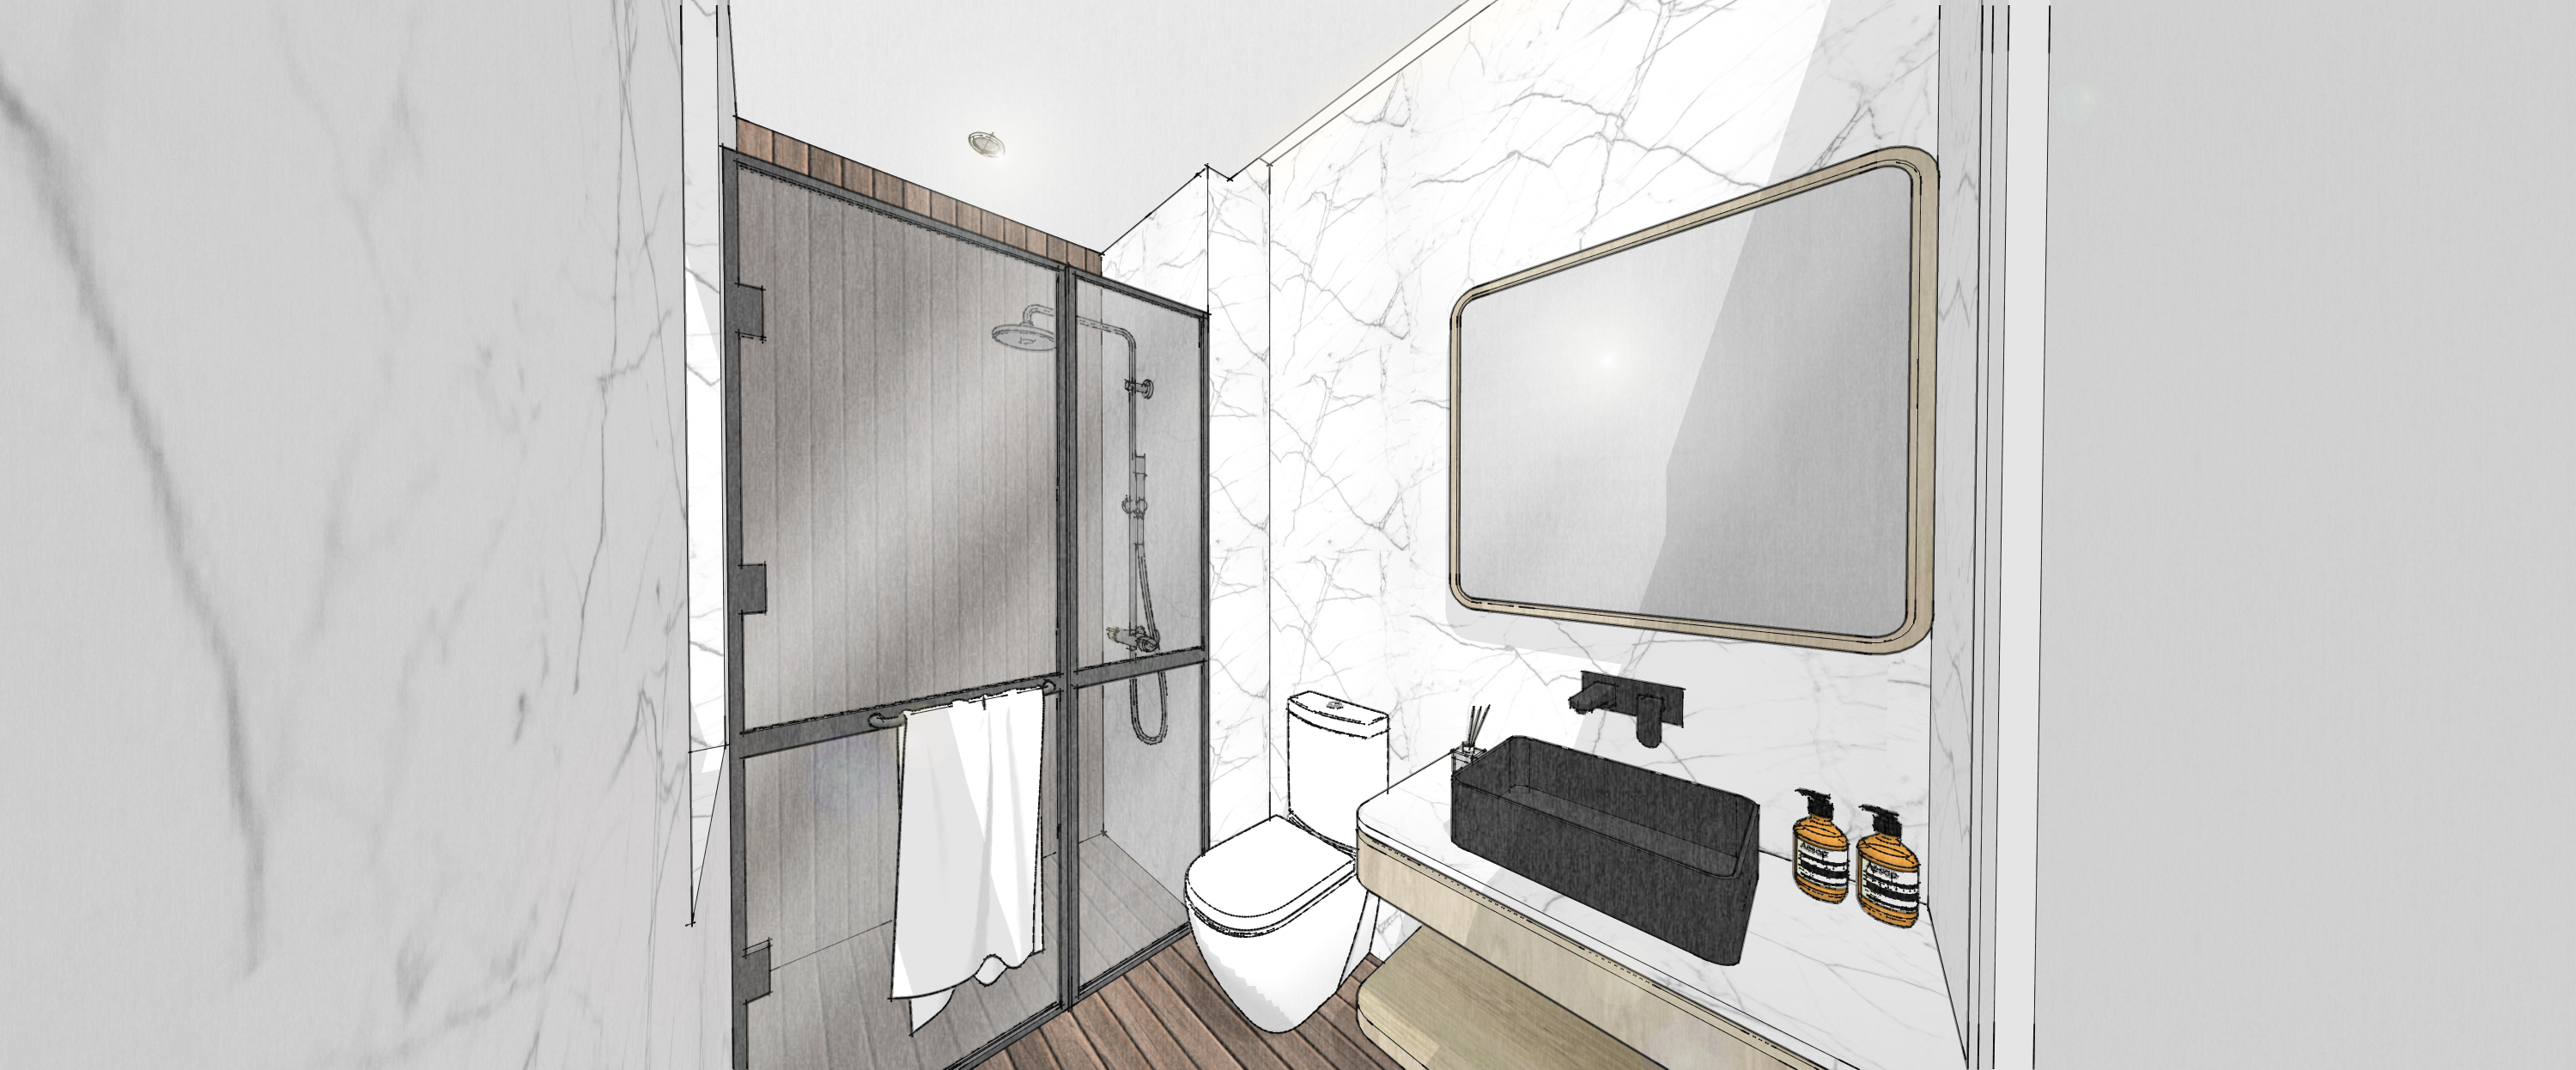


It has been a while since we featured any Bathrooms in this Behind the Scenes series. But here it is, 2 in 1.
Once tiles are removed, then pipping to works to commence to follow by patching up and waterproofing. We waterproof our bathrooms up to 6 feet in all areas, as opposed to only in the shower area (and 2 feet in other areas) which is a common current practice.
Before tilling is done, each tiles are also cemented and tiles adhesive is being applied. This provides additional grip and prevents hollow tiles which is all so common especially in new development properties. Takes up more time and cost, but so worth it.


Shared bathrooms, especially with Kids using them, tend to always be a bit sleeker and toned down in terms of color palette.
Next up, carpentry to completion!


